DIGITAL SHADE TAKING BY SPECTROPHOTOMETRY ACCESSIBLE TO ALL
ADVANTAGES
Ergonomics
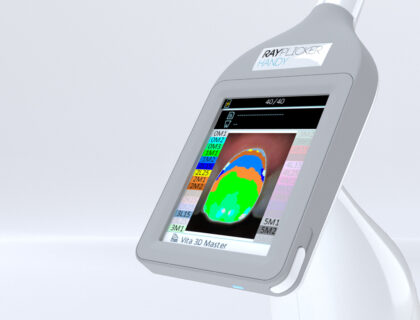
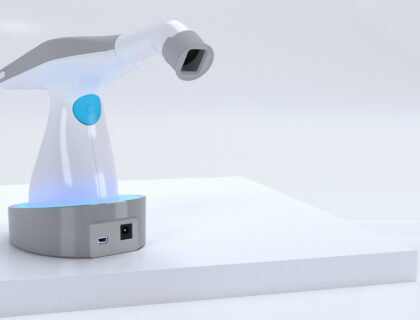
Touch screen, miniaturized measuring head.
Plug & Play
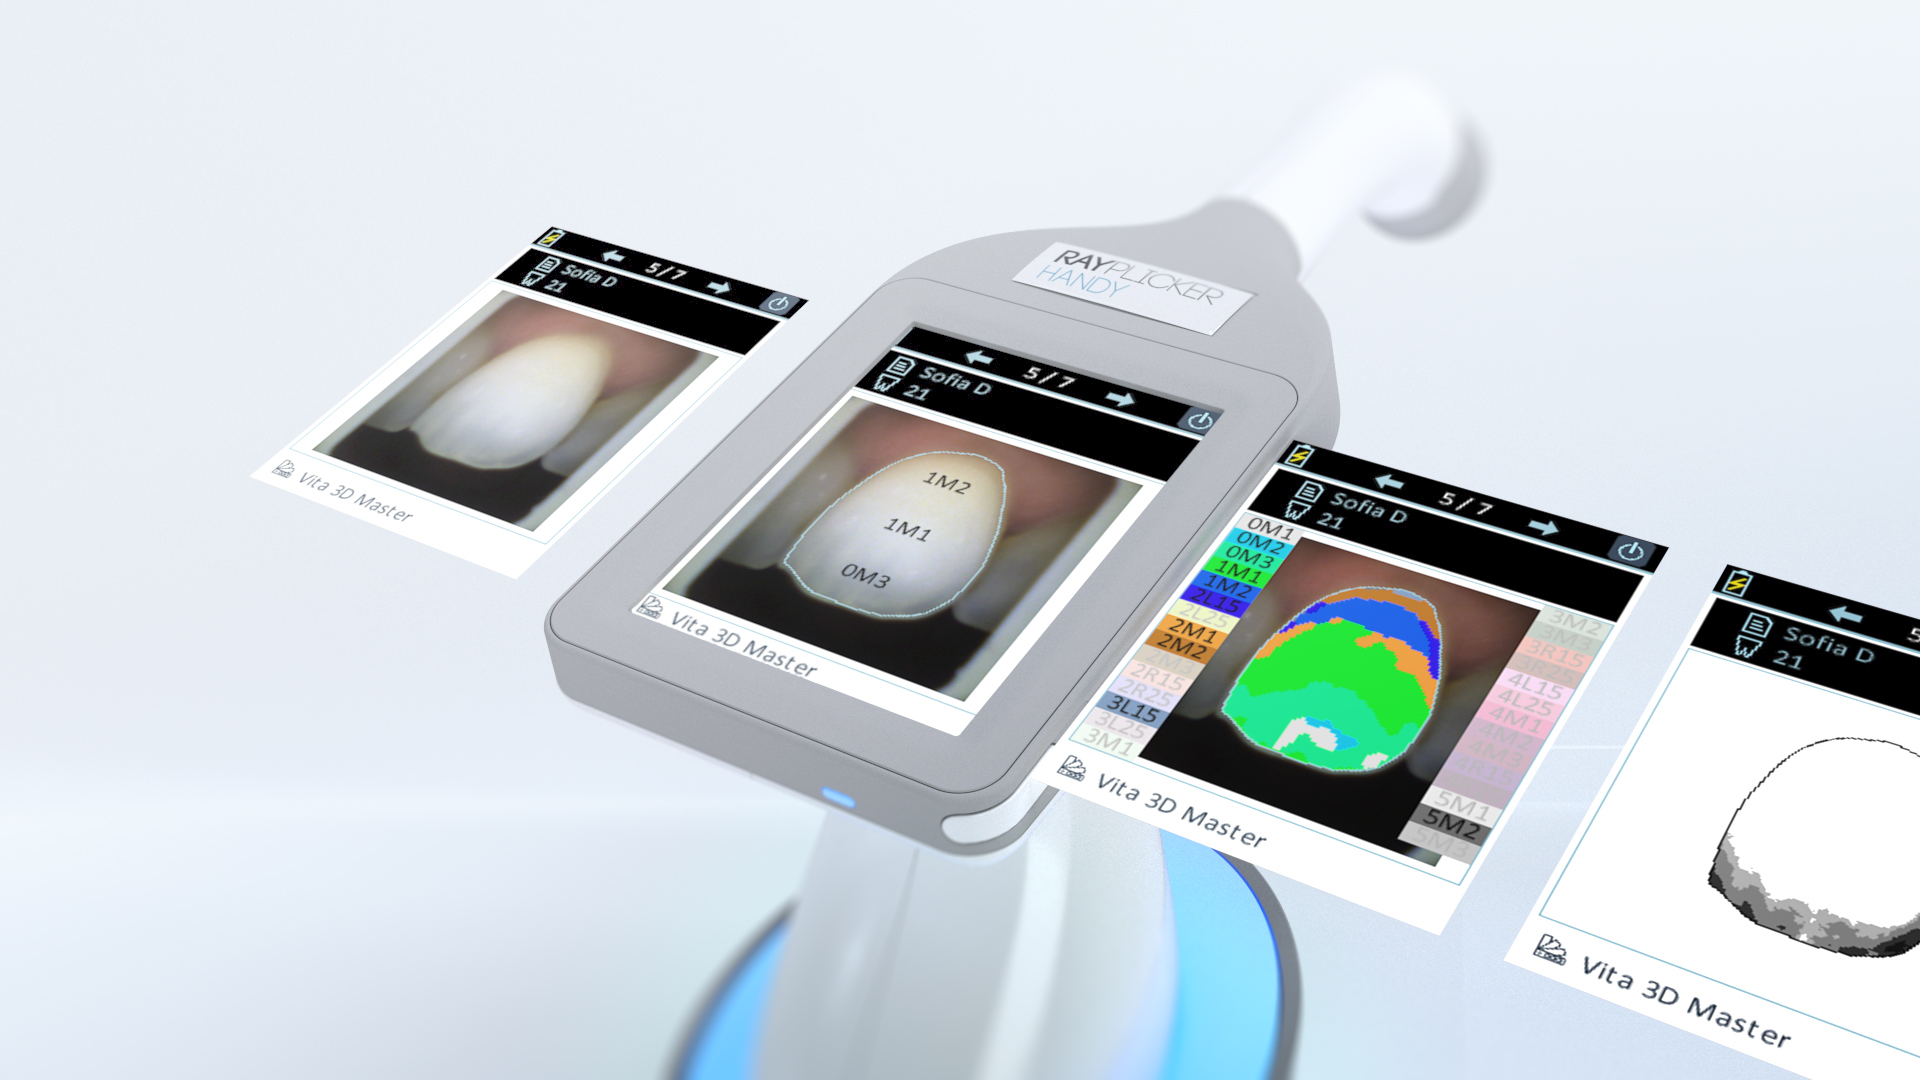
Autocalibrated device. Shade mapping displayed directly on the screen.
Time saving and cost effective
Complete color analysis in seconds. High return on investment.
Flexibility
Configuration of the shade guide of your choice. Up to 4 user profiles.
Accuracy
Ultra-precise analysis down to the pixel.
Reliability
Patented technology offering objectivity and repeatability.
Hygiene
Sterilizable calibration tips.
Digital files
Ensures traceability and sharing without loss of information.
High-tech
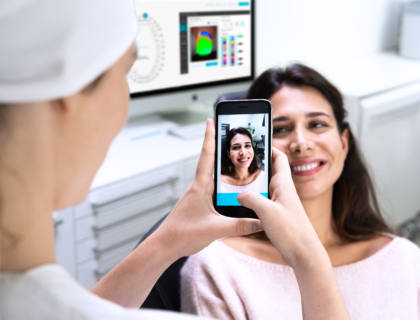
Share a high-tech and educational experience with your patients.
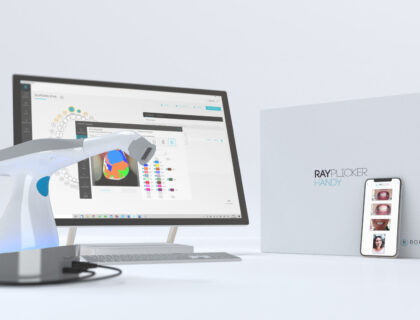
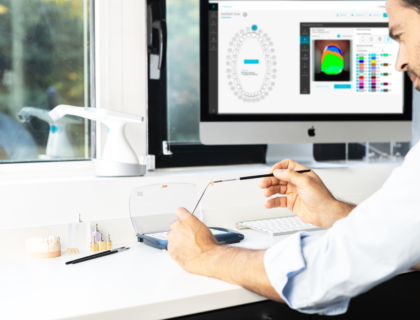
The Rayplicker Handy is an innovation that meets the current requirements of cosmetic dentistry. This portable spectrophotometer offers a fast, reliable, ergonomic and complete turnkey solution for the perfect and traceable production of a dental prosthesis.
Protected by several patents filed in 2015, 2016 and 2018, Rayplicker Handy makes it possible to obtain, in a single acquisition, ultra-precise color maps (brightness, hue, saturation) and complete translucency of a tooth.
By its ease of use and its performance, Rayplicker Handy has become a must have in the dental practice.
TECHNICAL CHARACTERISTICS
Spectrophotometer : measuring range 400-700 nm Screen : touch screen CMOS sensor : 400x400 px Resolution : 320 x 240 NTSC Battery : Li-Po 3,7 V 2200 mAh Internal memory : 40 shade acquisitions Dimensions of the measuring head in mm : L. 76 / Diameter ⌀ : 25 Dimensions of the handpiece in mm : L. 210 x l. 75 x H.155 Dimensions of the docking station in mm : L.133 x l. 101 x. H.43 Handpice weight : 390 g Docking station weight : 340 g Connection : 1 USB 2.0 output Charger : 5V 1Ah
Rayplicker Handy is the turnkey solution for your practice or laboratory!
CUSTOMER TESTIMONIAL
The Rayplicker Handy has a rightful place like all the other “toys” in my office, as my goal is to be fast and efficient. In one click, I have the global or detailed shade so I only have to choose my block to mill according to the information and that’s it!
The Rayplicker became essential to me, it fits in naturally during my prosthetic and brightening treatments, and sometimes for anterior composite restoration in order to get an aesthetical result which matches perfectly with adjacent teeth.
USECAN I VIEW THE REGISTERED SHADES ON MY RAYPLICKER HANDY DEVICE?
To view the registered shades on your device, click on the “magnifying glass” icon from the home screen. Use the arrows in the upper band to navigate and view the different recorded shade takings. For information, you can register up to 40 files into the device. Once transferred to the Rayplicker Vision software, a file is automatically deleted from the device memory.
USEIS MY RAYPLICKER HANDY DEVICE INFLUENCED BY THE EXTERNAL ENVIRONMENT?
No, the Rayplicker Handy device is not influenced by the external environment thanks to the calibration tip positioned at the top of the measuring head.
However, if the positioning of this tip is too far from the reference tooth, it no longer acts as a darkroom and the outside light will interfere in the shade taking. It is essential that the grey calibration tip remains in contact with the adjacent teeth and the gingiva.
If a retractor is used (to get access to posterior teeth for example), it is recommended to take the shade in a low light environment. We advise you to follow the following recommendations:
Remove the dental operating light from the patient’s mouth or turn it off,
Your patient should have his back to the window in case of direct sun exposure.
USEHOW CAN I MODIFY THE REFERENCE SHADE GUIDE ON MY RAYPLICKER HANDY DEVICE?
To configure your Rayplicker Handy device on another reference shade guide, connect your device to the computer by positioning it on its docking station and then connect it by USB.
The device must be turned on and on the home screen. From your Rayplicker software, click on settings / device / change device shade guide.
Select your device, then select the shade guide of your choice and click on configure.